Adding Railing to Your Deck: A Comprehensive Guide
A deck is a fantastic addition to any home, providing a space for relaxation, entertainment, and enjoying the outdoors. However, a deck without railing can be unsafe, especially if it’s elevated. Adding railing to deck is not just about safety; it also enhances the aesthetic appeal of your outdoor living space. This comprehensive guide will walk you through the process, from planning and choosing materials to installation and maintenance.
Why Add Railing to Your Deck?
The primary reason for adding railing to deck is safety. Railings prevent accidental falls, especially for children and pets. Building codes often mandate railings for decks above a certain height. Beyond safety, railings contribute to the overall design and style of your deck, increasing your home’s value and curb appeal.
- Safety: Prevents falls and injuries.
- Code Compliance: Meets local building regulations.
- Aesthetics: Enhances the look of your deck.
- Property Value: Increases your home’s value.
Planning Your Deck Railing Project
Assess Your Deck
Before you start, inspect your deck’s existing structure. Ensure the deck is structurally sound and can support the added weight and stress of the railing. Look for signs of rot, decay, or damage. Repair any issues before proceeding. Consider the height of your deck; higher decks require sturdier railings and may have more stringent code requirements.
Check Local Building Codes
Building codes vary by location, so it’s crucial to check your local regulations regarding deck railings. Codes typically specify the minimum height of the railing (usually 36 inches for residential decks), the spacing between balusters (typically no more than 4 inches to prevent small children from squeezing through), and the load-bearing capacity of the railing. Ignoring these codes can result in fines and the need to redo the work.
Design Considerations
Think about the style and design of your railing. Do you want a traditional wood railing, a modern metal railing, or a low-maintenance composite railing? Consider the overall look of your home and choose a railing style that complements it. Also, think about the view from your deck. Do you want a railing that provides an unobstructed view, or are you looking for more privacy? [See also: Deck Design Ideas for Small Spaces]
Choosing the Right Materials for Your Deck Railing
The materials you choose will impact the appearance, durability, and cost of your railing. Here are some popular options:
- Wood: Wood is a classic choice that offers a natural look and can be stained or painted to match your deck. Common wood types include cedar, redwood, and pressure-treated lumber. Wood railings require regular maintenance, such as staining or sealing, to prevent rot and decay.
- Composite: Composite railings are made from a combination of wood fibers and plastic. They are low-maintenance, resistant to rot and insects, and come in a variety of colors and styles. Composite railings are more expensive than wood but offer long-term durability.
- Metal: Metal railings, such as aluminum or steel, offer a sleek, modern look. They are strong, durable, and require minimal maintenance. Metal railings can be powder-coated to resist rust and corrosion.
- Vinyl: Vinyl railings are another low-maintenance option. They are resistant to rot, insects, and fading. Vinyl railings are available in a variety of colors and styles and are easy to install.
- Glass: Glass railings provide an unobstructed view and a contemporary look. They are typically made of tempered glass for safety and are often combined with metal or wood frames.
When choosing materials, consider your budget, the climate in your area, and the level of maintenance you’re willing to undertake. If you live in an area with harsh weather conditions, choose materials that are resistant to moisture, UV rays, and temperature changes. The process of adding railing to deck can be significantly influenced by the choice of material.
Tools and Materials Needed
Before you begin the installation, gather all the necessary tools and materials. Here’s a basic list:
- Measuring tape
- Pencil
- Circular saw or miter saw
- Drill with various drill bits
- Level
- Post-hole digger (if setting new posts)
- Concrete mix (if setting new posts)
- Screws or nails
- Safety glasses
- Gloves
- Railing posts
- Railing sections or balusters
- Top and bottom rails
- Post caps
- Fasteners (screws, bolts, or nails) appropriate for your chosen materials
Ensure you have all the necessary safety equipment, such as safety glasses and gloves, to protect yourself during the installation process. Adding railing to deck also means considering the appropriate fasteners for your chosen material.
Step-by-Step Installation Guide
Here’s a general guide to adding railing to deck. Always refer to the manufacturer’s instructions for your specific railing system, as installation methods can vary.
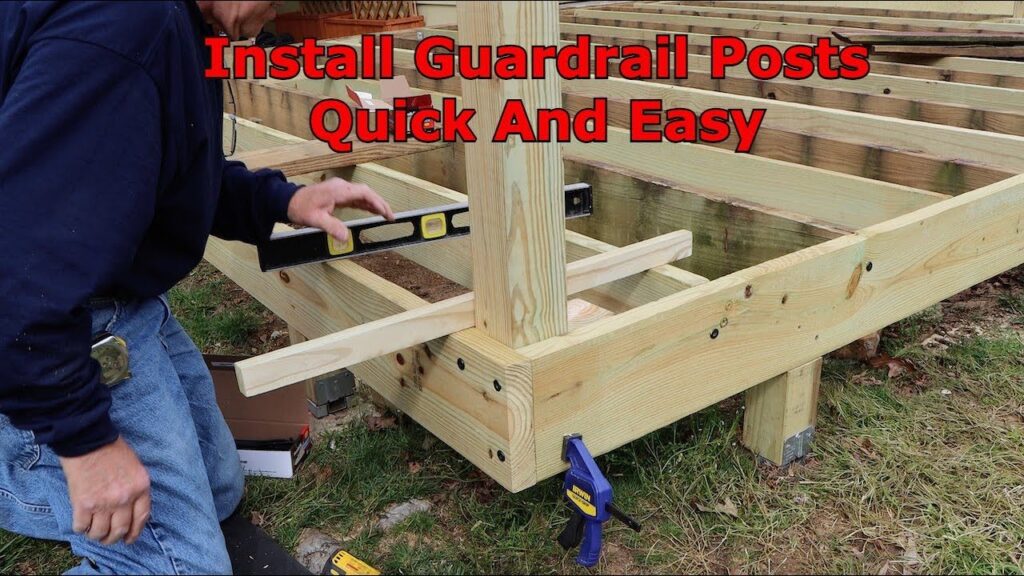
Step 1: Install Railing Posts
The first step is to install the railing posts. These posts provide the structural support for the entire railing system. If you’re replacing existing railings, remove the old posts carefully. If you’re installing new posts, determine their placement based on the length of your railing sections and local building codes. Typically, posts are spaced no more than 6 to 8 feet apart.
For surface-mounted posts, use heavy-duty brackets and fasteners to secure the posts to the deck’s frame. Ensure the posts are plumb (perfectly vertical) using a level. For in-ground posts, dig post holes that are deep enough to provide adequate support. Set the posts in concrete, ensuring they are plumb. Allow the concrete to cure completely before proceeding.
Step 2: Attach Top and Bottom Rails
Once the posts are securely in place, attach the top and bottom rails. These rails provide the horizontal support for the balusters. Measure and cut the rails to the appropriate length. Attach the rails to the posts using screws or bolts. Ensure the rails are level and securely fastened. Consider using metal brackets to reinforce the connections.
Step 3: Install Balusters
Next, install the balusters. Balusters are the vertical supports that fill the space between the top and bottom rails. Measure and cut the balusters to the appropriate length. Ensure the spacing between balusters complies with local building codes (typically no more than 4 inches). Attach the balusters to the top and bottom rails using screws or nails. Use a level to ensure the balusters are plumb and evenly spaced.
Step 4: Add Finishing Touches
Once the balusters are installed, add any finishing touches, such as post caps or decorative trim. Post caps protect the tops of the posts from moisture and add a decorative element. Inspect the entire railing system to ensure all connections are secure and the railing is stable. Apply a sealant or stain to protect the wood from the elements, if applicable. [See also: Deck Maintenance Tips to Extend Its Life]
Safety Considerations
Safety is paramount when adding railing to deck. Wear safety glasses and gloves to protect yourself from injury. Use power tools carefully and follow the manufacturer’s instructions. Ensure the railing system is structurally sound and meets local building codes. If you’re not comfortable with any aspect of the installation, consider hiring a professional contractor.
Maintenance Tips
Regular maintenance will help prolong the life of your deck railing and keep it looking its best. Here are some maintenance tips:
- Inspect regularly: Check the railing for signs of damage, such as rot, cracks, or loose connections.
- Clean: Clean the railing regularly with soap and water to remove dirt and debris.
- Stain or seal: Apply a sealant or stain to protect wood railings from moisture and UV rays.
- Tighten connections: Tighten any loose screws or bolts.
- Replace damaged components: Replace any damaged components promptly to prevent further damage.
Cost Considerations
The cost of adding railing to deck can vary widely depending on the materials you choose, the size of your deck, and whether you hire a professional contractor. Wood railings are typically the least expensive option, while composite and metal railings are more expensive. Labor costs can also vary depending on your location and the complexity of the project.
Before you start, get quotes from several contractors and compare prices. Be sure to factor in the cost of materials, labor, and any necessary permits. Consider the long-term costs of maintenance when choosing materials. Low-maintenance materials, such as composite or metal, may cost more upfront but can save you money in the long run.
DIY vs. Hiring a Professional
Deciding whether to DIY or hire a professional depends on your skills, experience, and comfort level. If you’re comfortable with basic carpentry and have experience using power tools, you may be able to install the railing yourself. However, if you’re not confident in your abilities, it’s best to hire a professional contractor. A professional can ensure the railing is installed correctly and meets local building codes.
Adding railing to deck can be a rewarding DIY project, but it’s essential to assess your abilities honestly. Hiring a professional can save you time, money, and potential headaches in the long run.
Conclusion
Adding railing to deck is an excellent way to enhance the safety, aesthetics, and value of your outdoor living space. By planning carefully, choosing the right materials, and following the installation steps, you can create a beautiful and functional railing that will last for years to come. Whether you choose to DIY or hire a professional, take the time to do it right and enjoy the benefits of a well-built deck railing.
