How to Tighten a Faucet Handle: A Comprehensive Guide
A loose faucet handle isn’t just an annoyance; it can also indicate a more significant underlying problem, such as a worn-out cartridge or a corroded stem. Knowing how to tighten a faucet handle can save you money on plumbing repairs and prevent further damage to your fixture. This guide provides a step-by-step approach to diagnosing and fixing loose faucet handles, ensuring a secure and functional faucet.
Understanding the Problem: Why is Your Faucet Handle Loose?
Before diving into the repair process, it’s crucial to understand why your faucet handle is loose. Common causes include:
- Loose Screws: This is the most frequent culprit. Over time, the screws holding the handle in place can loosen due to regular use and vibrations.
- Worn-Out Cartridge: The cartridge controls the water flow and temperature. If it’s worn, the handle may feel loose or wobbly.
- Corroded Stem: Corrosion can weaken the connection between the handle and the valve stem, leading to a loose handle.
- Damaged Handle Adapter: Some faucets use a plastic or metal adapter to connect the handle to the stem. If this adapter is damaged, the handle will likely feel loose.
Tools You’ll Need
Gathering the right tools beforehand will streamline the repair process. Here’s a list of essential items:
- Screwdrivers: Both Phillips head and flathead screwdrivers in various sizes.
- Allen Wrench Set: For setscrew-type handles.
- Adjustable Wrench: To tighten the packing nut if necessary.
- Penetrating Oil: To loosen corroded screws or parts.
- Clean Cloths or Rags: To wipe up spills and protect surfaces.
- Replacement Parts: Cartridge, screws, or handle adapter if needed.
Step-by-Step Guide: Tightening the Faucet Handle
Step One: Identify the Faucet Type
Different faucet types have different handle attachment mechanisms. Common types include:
- Single-Handle Faucets: Typically use a setscrew or a screw concealed under a decorative cap.
- Two-Handle Faucets: Often have screws hidden under decorative caps or directly visible on the handle.
- Ball-Type Faucets: These use a ball valve and have a unique handle design, usually secured by a setscrew.
Identifying the faucet type will help you determine the correct approach to tightening the handle.
Step Two: Turn Off the Water Supply
Before starting any plumbing repair, it’s crucial to turn off the water supply to the faucet. Locate the shut-off valves under the sink. Turn both the hot and cold water valves clockwise until they are completely closed. If you can’t find shut-off valves under the sink, you may need to turn off the main water supply to your house. [See also: How to Replace a Faucet Cartridge]
Step Three: Remove the Handle
The method for removing the handle depends on the faucet type:
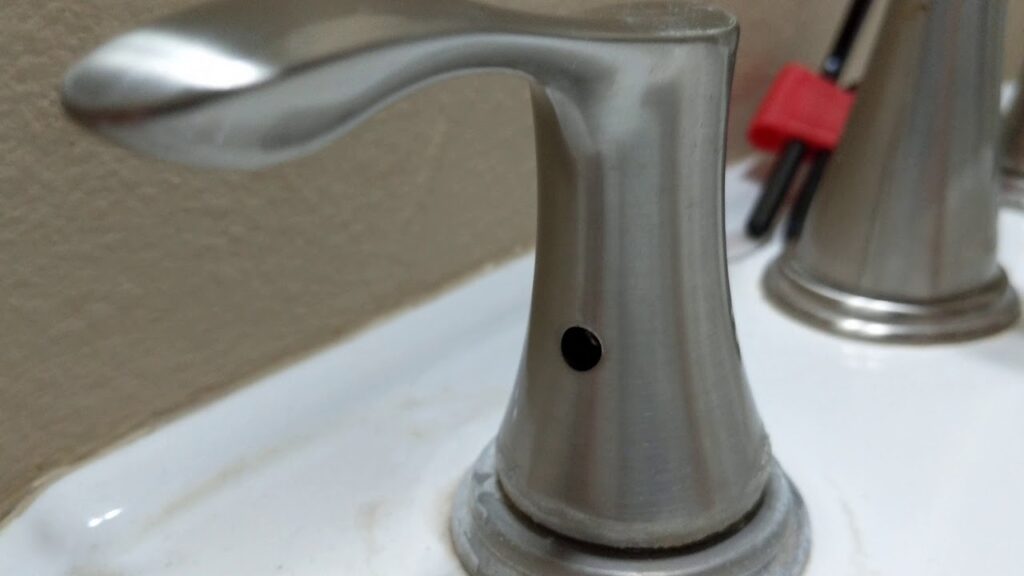
- For Handles with Setscrews: Locate the setscrew, usually on the side or back of the handle. Use an Allen wrench to loosen the setscrew. Once loose, gently pull the handle off the stem.
- For Handles with Decorative Caps: Use a small flathead screwdriver or a utility knife to carefully pry off the decorative cap. Underneath, you’ll find a screw. Unscrew it with the appropriate screwdriver (Phillips or flathead) and then remove the handle.
- For Handles with Visible Screws: Simply unscrew the visible screw and remove the handle.
Step Four: Inspect the Components
Once the handle is removed, inspect the following components:
- Screws: Check for stripped threads or damage. If the screws are damaged, replace them.
- Handle Adapter: Look for cracks or breaks. Replace the adapter if necessary.
- Valve Stem: Check for corrosion or damage. If the stem is corroded, clean it with a wire brush and apply penetrating oil. If the stem is severely damaged, you may need to replace the entire valve.
- Cartridge: If the faucet uses a cartridge, inspect it for wear or damage. A worn-out cartridge can cause the handle to feel loose. If necessary, replace the cartridge.
Step Five: Tighten or Replace the Loose Components
Based on your inspection, take the following actions:
- Tighten Loose Screws: If the screws are simply loose, tighten them securely. Be careful not to overtighten, as this can strip the threads.
- Replace Damaged Screws: If the screws are stripped or damaged, replace them with new screws of the same size and type.
- Replace the Handle Adapter: If the handle adapter is damaged, replace it with a new one. Make sure to purchase the correct adapter for your faucet model.
- Replace the Cartridge: If the cartridge is worn out, replace it with a new one. [See also: Choosing the Right Faucet Cartridge]
Step Six: Reassemble the Faucet
After tightening or replacing the necessary components, reassemble the faucet in the reverse order of disassembly:
- Place the handle back onto the valve stem or handle adapter.
- Secure the handle with the screw or setscrew. If using a setscrew, make sure it’s tightened securely against the flat part of the valve stem.
- If the handle has a decorative cap, snap it back into place.
Step Seven: Test the Faucet
Turn the water supply back on slowly. Check for leaks around the handle and the base of the faucet. Turn the handle to test the water flow and temperature. If the handle is still loose, repeat the inspection and tightening process. Make sure you know how to tighten a faucet handle. A properly tightened faucet handle should feel secure and operate smoothly.
Troubleshooting Common Issues
Even with careful attention, you might encounter some common issues during the repair process:
- Stripped Screws: If the screw threads are stripped, the screw won’t tighten properly. Try using a slightly larger screw or wrapping the screw threads with Teflon tape to create a tighter fit. If these methods don’t work, you may need to replace the entire handle.
- Corroded Parts: Corrosion can make it difficult to remove screws or other components. Apply penetrating oil and let it sit for a few minutes before attempting to remove the corroded parts.
- Difficulty Removing the Handle: If the handle is stuck, gently tap it with a rubber mallet to loosen it. Avoid using excessive force, as this can damage the handle or the valve stem.
Preventative Maintenance
Preventing loose faucet handles is often easier than fixing them. Here are some tips for maintaining your faucets:
- Regularly Check Screws: Periodically check the screws on your faucet handles and tighten them as needed.
- Avoid Overtightening: Overtightening screws can damage the threads and lead to future problems.
- Use the Right Tools: Using the correct tools for the job can prevent damage to the faucet components.
- Consider Water Softener: Hard water can cause corrosion and mineral buildup, which can lead to loose handles. Consider installing a water softener to protect your plumbing fixtures.
When to Call a Professional
While many faucet handle issues can be resolved with DIY repairs, there are times when it’s best to call a professional plumber. Consider calling a plumber if:
- You’re not comfortable working with plumbing.
- You’ve tried tightening the handle, but it’s still loose.
- You suspect a more significant plumbing problem, such as a leak inside the wall.
- You’re dealing with a complex faucet system that you’re not familiar with.
Conclusion
Knowing how to tighten a faucet handle is a valuable skill for any homeowner. By following the steps outlined in this guide, you can quickly and easily fix a loose faucet handle and prevent further damage to your plumbing. Remember to always turn off the water supply before starting any plumbing repair, and don’t hesitate to call a professional if you’re unsure about any aspect of the process. Ensuring that your faucet handles are secure will contribute to the overall functionality and longevity of your plumbing system. Learning how to tighten a faucet handle is a simple task with significant benefits. Properly maintaining your faucets will prevent unnecessary water waste and costly repairs. Understanding how to tighten a faucet handle also allows for timely intervention, preventing minor issues from escalating into major plumbing emergencies. Furthermore, knowing how to tighten a faucet handle empowers you to handle basic home maintenance tasks confidently. Always remember safety precautions and consult a professional when necessary. This knowledge of how to tighten a faucet handle contributes to responsible homeownership. Regularly checking and maintaining your faucets, including knowing how to tighten a faucet handle, extends their lifespan. This proactive approach prevents the need for frequent replacements. So, take the time to learn how to tighten a faucet handle and safeguard your home’s plumbing system. With this knowledge, how to tighten a faucet handle will no longer be a mystery, but a manageable task. Learning how to tighten a faucet handle saves you money on potential plumbing bills. Finally, understanding how to tighten a faucet handle adds to your overall home maintenance skills.
